TL;DR
- Cabinet painting in San Diego runs $3,200–$7,500 for a full kitchen and $650+ for a single vanity.
- The job takes 5–7 days, doors come off and go to a spray booth, boxes get painted in place.
- Proper prep (sand, degrease, bonding primer, two-coat waterborne enamel) is what separates 10-year finishes from 2-year peelers.
- Kitchen stays partially usable through the project, plan on 48 hours without cabinet access mid-project.
- Biggest visual upgrade per dollar in a kitchen that doesn’t need a full remodel.
Cabinet painting is the single highest-impact, lowest-disruption kitchen project you can do. A full remodel is $40,000+ and 8 weeks of dust. A fresh coat on solid cabinets is $5,000 and a week of your life. This post walks through the actual process, what the good crews do differently, and what determines whether your cabinets look factory-smooth or hand-brushed two years from now.
What does cabinet painting cost in San Diego?
Here’s what typical scopes run in 2026:
| Scope | Typical San Diego cost | Typical timeline |
|---|---|---|
| Single vanity (30”–36”) | $650–$950 | 3 days |
| Double vanity (60”–72”) | $950–$1,400 | 4 days |
| Small kitchen (10–15 doors/drawers) | $3,200–$4,800 | 5 days |
| Standard kitchen (20–30 doors/drawers) | $4,500–$6,800 | 5–7 days |
| Large kitchen (30+ doors/drawers) | $6,500–$9,500 | 7–10 days |
| Hardware swap (add-on) | $180–$450 | Included in timeline |
| Soft-close hinge upgrade (add-on) | $8–$12 per hinge | Included in timeline |
Prices assume solid cabinet boxes (wood, MDF, or plywood, not thermofoil), removal and reinstall, sprayed enamel finish, and standard latex waterborne paint. Darker colors, two-tone (uppers vs. lowers), and textured finishes add cost.
Why is the process different from wall painting?
Cabinets aren’t walls. They’re handled constantly, get splashed with water and grease, take impact from dishes and kids, and sit in front of judgmental daylight every day. Paint that works fine on a wall doesn’t last six months on a cabinet door.
The three differences that matter:
- Paint type. Regular latex wall paint is soft and scuffs. Cabinets need a waterborne alkyd or urethane enamel (Benjamin Moore Advance, Sherwin-Williams Emerald Urethane) that dries hard and levels out without brush strokes.
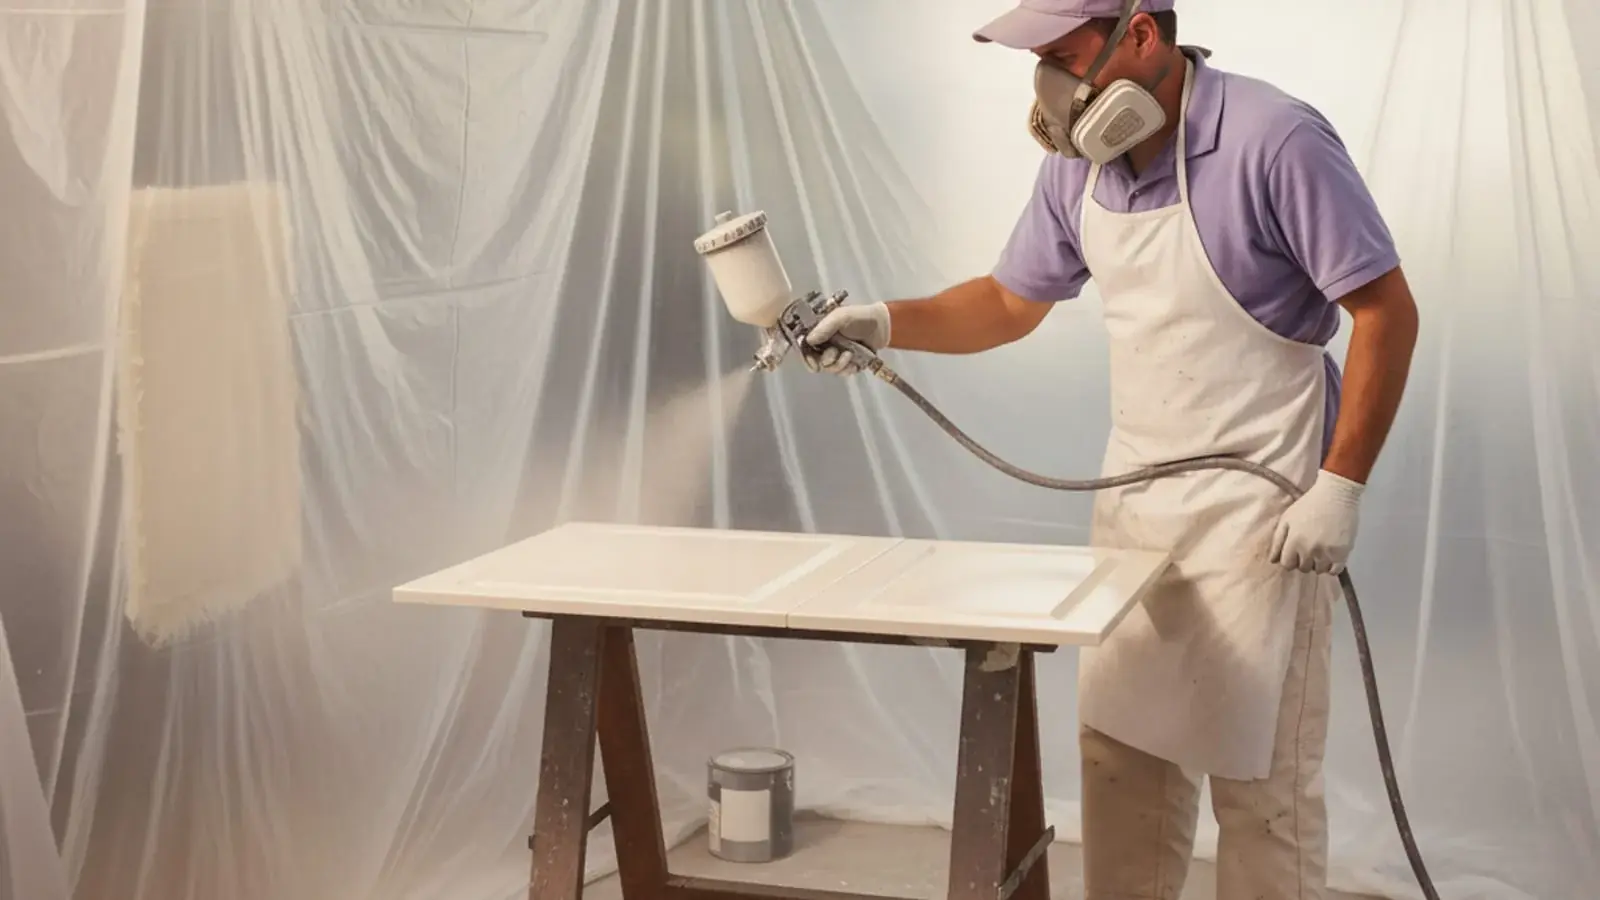
- Application. Walls are rolled; cabinets are sprayed. A roller leaves stipple texture that looks fine on a big wall and terrible on a cabinet door. A brush leaves brush strokes. A spray gun in a proper booth gives a factory-grade surface.
- Prep depth. Walls with light sanding will accept new paint. Cabinets need degreasing, thorough sanding (150-grit minimum), and a bonding primer (INSL-X Cabinet Coat or SW Extreme Bond) to actually stick to the factory finish.
The full cabinet-painting sequence
Here’s what a proper 5–7 day project looks like:
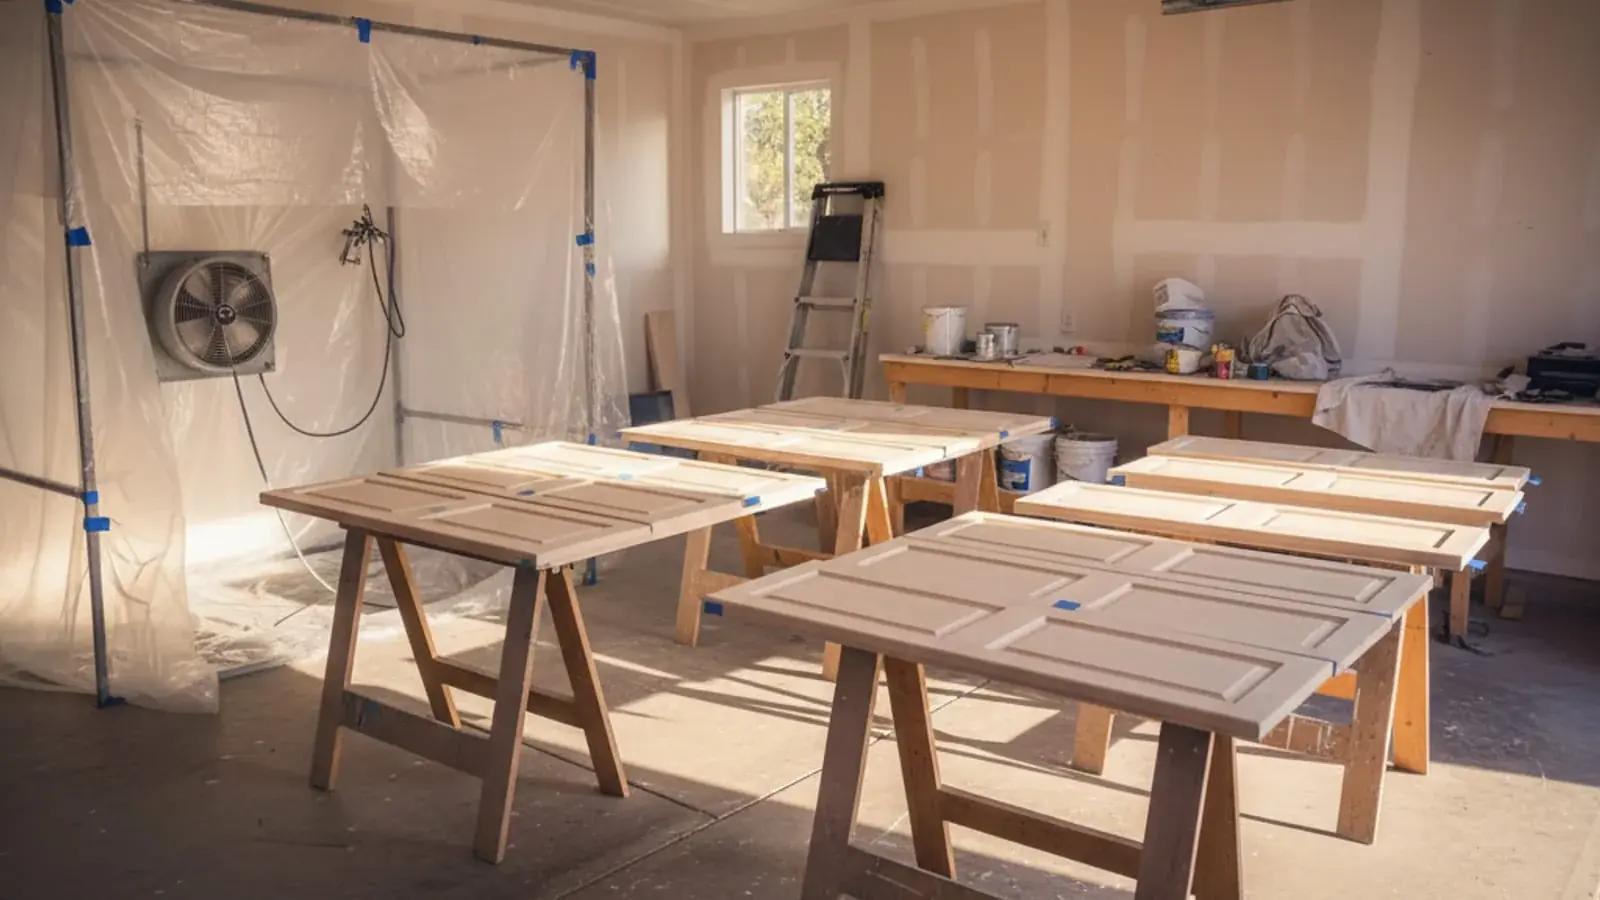
Day 1: Remove, label, transport
Every door and drawer front comes off. Each gets labeled at the hinge corner with blue tape (e.g., “U1”, “U2” for uppers, “L1”, “L2” for lowers) and photographed in place so reinstall is foolproof. Hinges and hardware come off and go into labeled bags.
Doors and drawers get loaded into the truck and transported to a dust-free spray booth. The booth matters, even minor dust in the air during spray lands in the wet finish and shows forever.
Day 2: Prep doors + prep boxes
At the shop:
- Degrease every door with TSP or a degreasing cleaner. Kitchen cabinets near the stove have cooking oil residue that paint will not stick to.
- Sand every surface, fronts, backs, edges, with 150-grit. This opens the factory finish so primer can bond.
- Tack-cloth every sanded surface to remove dust.
- Spray a single coat of bonding primer. Let dry per spec (usually 4 hours).
- Light sand with 220-grit after primer.
- Tack-cloth again.
At the house:
- Mask floor-to-ceiling around the cabinet boxes with plastic sheeting.
- Remove doors if still on (inventory check).
- Degrease and sand the boxes (same prep as doors but done in place).
- Bonding primer on boxes.
Day 3: First finish coat
Doors get their first spray coat of waterborne enamel (Benjamin Moore Advance is the industry standard for cabinets, BM Aura Urethane or SW Emerald Urethane are alternatives). Each door sprays in a single session: face up, edges, then flip after cure and spray the back.
Boxes get either sprayed (if the kitchen can be fully isolated from the rest of the house with plastic) or brushed-and-rolled with a microfiber roller that leaves a near-spray finish. Most kitchens get the brushed-and-rolled approach for boxes because spray overspray in a lived-in kitchen is hard to contain.
Cure 24 hours between coats for waterborne enamel. Don’t rush this, waterborne enamel “cures” over 30 days and rushing between coats softens the first coat.
Day 4: Second finish coat
Same as day 3. Doors spray, boxes roll. After the second coat, doors cure at the booth for another 24–48 hours while you admire the progress at the house.
Day 5: Box second coat dries; hardware prep
While boxes dry at the house, hinges and hardware get polished (if you’re keeping existing) or the new hardware gets inventoried and the drawer and door drilling jig gets set up.
Day 6–7: Transport doors back, install, adjust
Doors come back from the booth and get installed. Hinges adjusted so every door hangs square with consistent reveal gaps. Drawer slides checked and adjusted. New hardware installed.
Kitchen is back in service. Full cure continues for another 30 days but the cabinets can be used normally (just don’t clean them with anything abrasive for the first month).
What about refacing and replacing?
Three options at different price points:
- Painting: $3,200–$9,500. Keep existing doors and boxes, just refinish. Best choice when cabinets are structurally solid.
- Refacing: $8,000–$18,000. Keep existing boxes, replace doors and drawer fronts with new, and cover visible box faces with matching veneer. Mid-range option for dated door styles on good boxes.
- Replacing: $15,000–$50,000+. Tear out everything, start from scratch. Only the right call if the boxes are warped, water-damaged, or a different layout is needed.
For the majority of San Diego homes, kitchens from the 90s and early 2000s with oak, maple, or builder-grade cabinets, painting is the obvious ROI winner.
Can any cabinet be painted?
Most, with caveats:
- Solid wood, MDF, plywood: Yes. Standard process above.
- Thermofoil (plastic vinyl over MDF): Tricky. The vinyl can lift with heat and no amount of prep makes paint stick to a failing surface. Only works if the thermofoil is fully intact. If it’s bubbling or peeling anywhere, replace.
- Melamine: Possible with a dedicated bonding primer (XIM, Extreme Bond) but the paint scuffs easier than on wood. We quote melamine with the caveat that the finish won’t hold up to heavy abuse long-term.
- Laminate (Formica): Similar to melamine, possible with the right primer but not our first recommendation.
What colors work in 2026?
Most popular directions we’re doing now:
- Warm off-white uppers + charcoal or navy lowers. Two-tone, contemporary but not trendy.
- Greige or warm stone throughout. Softer than pure white, ages gracefully.
- Sage green or muted blue accent island. Island in a color, rest of kitchen in warm white.
- Matte black lowers + natural wood uppers. Only works if the wood is beautiful enough to stay visible, otherwise it reads like half the kitchen is unfinished.
Avoid pure bright white unless your kitchen has tons of natural light and a cool color palette elsewhere. Pure white reads stark and institutional in warm San Diego afternoon light.
Can I live in the house during painting?
Yes. The typical arrangement:
- Days 1–2 (prep): Kitchen partially usable. Boxes are being sanded and primed in place, but you can still use the counters and appliances.
- Days 3–4 (painting): Kitchen unusable for about 48 hours while boxes have wet paint. Plan takeout or a simpler setup elsewhere.
- Days 5–7 (wrap): Kitchen back in service progressively. Doors install on day 6 or 7.
Most families cover the 48 unusable hours with takeout, a rice cooker in another room, or a friend’s kitchen if that’s convenient.
DIY cabinet painting: should you?
Honest answer: usually no, but it depends.
DIY cabinet painting works if:
- You have a dust-free garage to spray doors
- You own or rent an HVLP spray gun and know how to use it
- You’re patient (minimum 2 weeks of effort)
- You accept that the finish may not be quite factory-grade
DIY cabinet painting fails if:
- You plan to brush the doors
- You skip the bonding primer
- You use regular latex wall paint
- You rush the cure between coats
- You expect it to look like a pro job
Most DIY cabinet jobs we see 1–2 years later are chipping at the handles, brush-marked on the doors, and already need a redo. The $3,200 pro minimum feels like a lot until you account for your time, redo cost, and lost kitchen use.
Frequently asked questions
How long does cabinet painting take in San Diego? A standard kitchen takes 5–7 days from door removal to reinstall. Small kitchens (10–15 doors) finish in 5 days; large kitchens with 30+ doors run 7–10 days. Single bathroom vanities take 3–4 days. The doors travel to a spray booth off-site while the boxes get painted in place, so both happen in parallel.
Can I use my kitchen while cabinets are being painted? Yes, with a 48-hour exception. During days 1–2 you can still use counters and appliances while the boxes are being prepped. Days 3–4, the boxes have wet paint and the kitchen is off-limits for roughly 48 hours. By days 5–7 doors are reinstalling and the kitchen comes back progressively. Most families manage the gap with takeout or a rice cooker set up in another room.
How long does cabinet paint take to fully cure? Waterborne enamel reaches a usable hardness in 24–48 hours between coats, but full cure takes 30 days. You can use the cabinets normally once the doors are reinstalled, but avoid abrasive cleaners and heavy scrubbing for the first month. Rushing the cure between coats softens the previous layer and is one of the most common reasons for early failure.
What prep is involved before cabinet painting? Every surface gets degreased (TSP or a degreasing cleaner), sanded to 150-grit to open the factory finish, tack-clothed, then primed with a bonding primer. After primer cures, a 220-grit light sand and another tack-cloth come before the first finish coat. Skipping any of these steps, especially degreasing near the stove, is what separates 10-year finishes from 2-year peelers.
How long does a professional cabinet paint job last in San Diego? With proper prep, a bonding primer, and two coats of waterborne alkyd or urethane enamel (Benjamin Moore Advance or Sherwin-Williams Emerald Urethane), a professional finish holds up 8–12 years with normal use. DIY jobs using wall paint or a brush typically show chipping at the handles within 1–2 years and need a redo.
Ready for a kitchen reset?
We’ll walk your kitchen, look at the cabinet construction, talk colors, and quote a defined scope. Free in-home estimate, or see our full cabinet painting scope.
For a deeper read, our complete kitchen cabinet painting guide for San Diego walks through colors, finishes, and timelines, and our roundup of cabinet painters near you helps if you’re still shopping around.