Professional popcorn ceiling removal in San Diego runs $1.50 to $3.50 per square foot, all-in, covering scrape, skim coat, prime, and paint. A typical bedroom costs $300–$700; a full single-story home runs $2,100–$4,900. Pre-1980 homes may need an asbestos test first, which adds $200–$450 and, if asbestos is found, abatement at $3–$7 per square foot on top. These are San Diego County rates for 2026, and they reflect local labor costs.
Typical price per square foot in San Diego
For most San Diego homes, professional popcorn ceiling removal runs between $1.50 and $3.50 per square foot, all-in. That range covers scraping, surface prep, skim coating, priming, and a fresh coat of paint.
A typical 200-square-foot bedroom lands somewhere between $300 and $700. A 1,400-square-foot single-story home with standard 8-foot ceilings usually comes in between $2,100 and $4,900, depending on texture complexity, ceiling height, and what the surface looks like underneath once the popcorn is off.
A few things push costs toward the higher end:
- Ceilings above 9 feet. Scaffolding or extended ladders add labor time.
- Heavy textures. Some installers applied the stuff in multiple passes. Thicker texture means more scraping time and a rougher substrate to repair.
- Water stains or soft drywall. Once the popcorn comes off, damaged drywall shows everything. Repairs add cost, but they’re not optional if you want the ceiling to look right.
- Asbestos. More on that below.
These prices reflect San Diego County labor rates in 2026. They’re higher than national averages, but wages here are higher too. A quote that comes in significantly below $1.50 per square foot is worth questioning.
The asbestos test step you can’t skip on pre-1980 homes
Popcorn texture applied before 1980 frequently contained chrysotile asbestos. It was cheap, fire-resistant, and widely used, until the health risks became undeniable.
If your home was built or significantly remodeled before 1980, you need a bulk sample test before anyone scrapes anything. This isn’t optional opinion. Asbestos work is governed by federal EPA asbestos rules and enforced locally through the San Diego County Air Pollution Control District. Disturbing asbestos-containing material without an approved abatement process is a violation, and the liability falls on whoever did the work.
Testing itself is straightforward. A certified inspector pulls small samples from the texture and sends them to an accredited lab. Results typically come back in 3–5 business days. Cost: $200–$450 for a residential sample.
If the test comes back clean, common in post-1978 homes and some 1970s builds that used asbestos-free products, you proceed with standard removal.
If asbestos is present, you’re looking at licensed abatement, not just scraping. That process involves negative-air containment, HEPA vacuums, and disposal according to SCAQMD protocol. Abatement adds roughly $3–$7 per square foot on top of the standard removal cost. It’s not cheap, but it’s not optional, and a contractor who skips it is creating a serious liability problem for you.
Always verify that any contractor you hire carries a current California C-33 license (specialty painting) and, for asbestos work, holds the appropriate state certification. You can check license status directly on the CSLB website.
Scrape, skim, prime, paint: what’s actually involved
Popcorn removal sounds simple, wet it down, scrape it off, but the steps after the scrape are where the quality difference shows up.
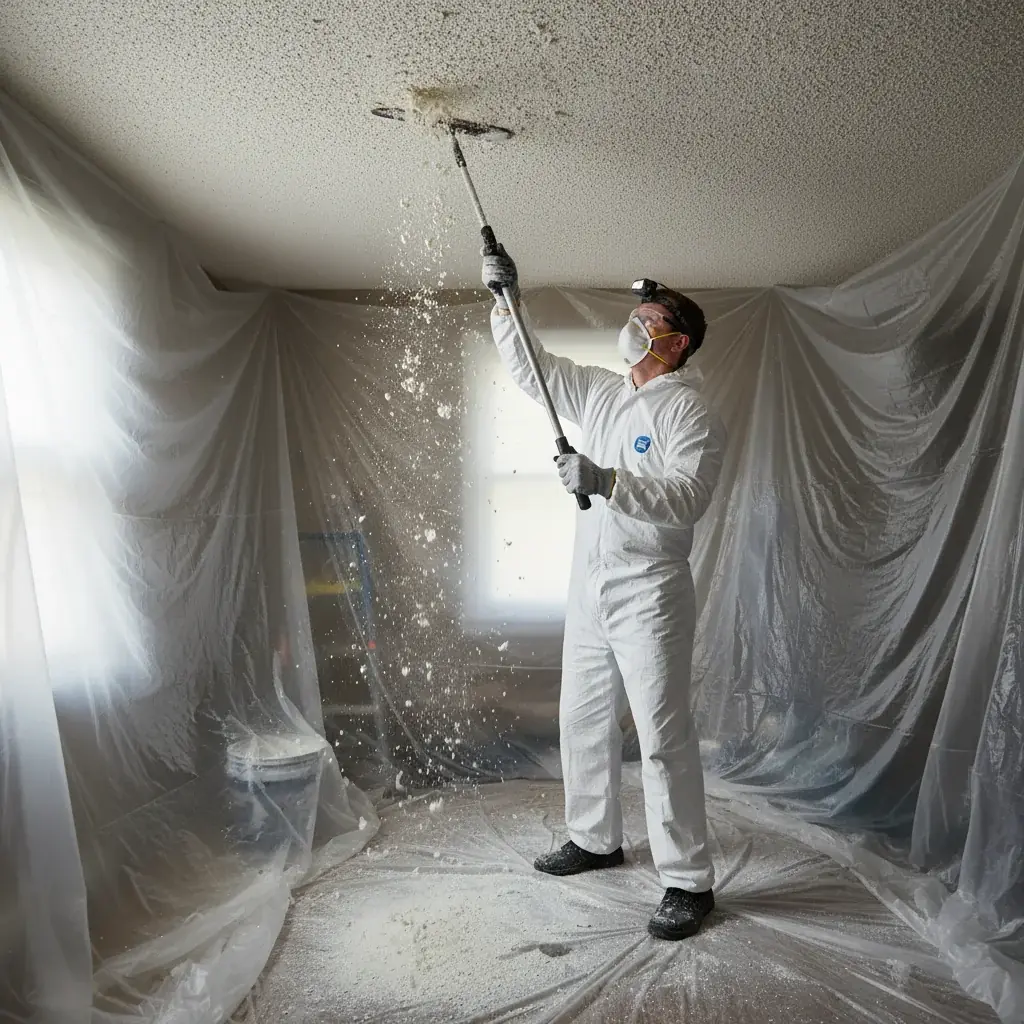
Wetting. The texture is misted with water to soften the binders. Too little water and it tears the drywall paper. Too much and the drywall itself gets saturated. Getting this right takes experience, not just effort.
Scraping. A wide 12-inch drywall knife removes the softened material in long, controlled passes. Every square foot matters here, rushing leaves ridges and torn paper.
Surface repair. This is where most DIY jobs fall apart. Scraping almost always damages the drywall face, gouges, torn paper fibers, old texture adhesion points. Our drywall repair work addresses these before anything else goes on the ceiling. Skipping this step means every imperfection telegraphs through the paint.
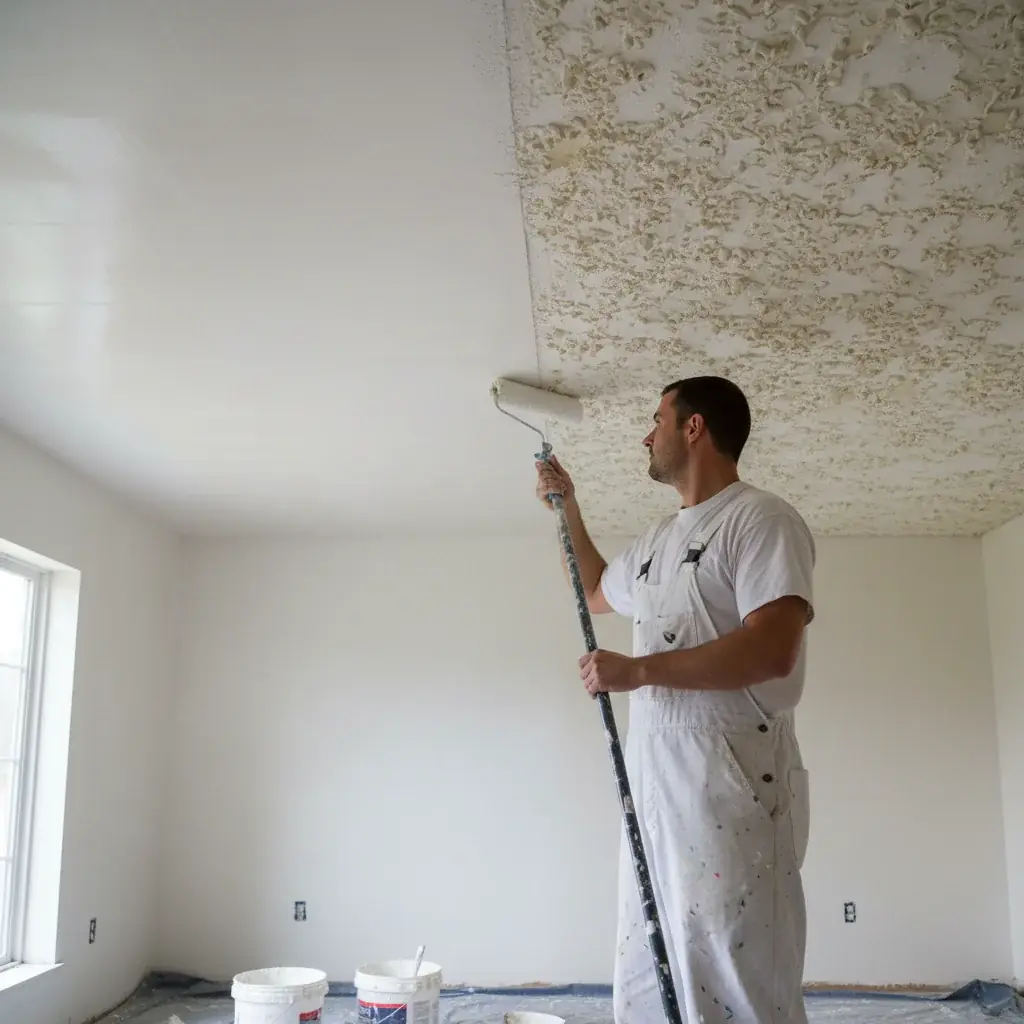
Skim coating. A thin layer of setting-type joint compound is troweled over the entire ceiling surface. This creates the flat, consistent plane that makes a smooth ceiling actually look smooth. One coat usually isn’t enough, two passes with light sanding between is standard.
Priming. Bare drywall and skim-coated surfaces are thirsty. A PVA primer seals the surface and gives the topcoat something to bond to uniformly. Without it, the paint flashes unevenly and shows every repair.
Painting. A flat or matte ceiling paint applied by roller completes the job. Most ceilings get two coats.
The whole sequence typically takes one to three days per room, depending on ceiling area and how much repair the surface needs.
Why texture matching matters after removal
Most San Diego homes don’t have uniformly popcorn-covered ceilings. There are often adjacent hallways, closets, or connected rooms with different textures, or walls with orange peel or knockdown that need to transition cleanly into the new smooth ceiling.
If you’re removing popcorn in one bedroom but leaving the hallway ceiling alone, the junction between old and new becomes a visible line unless someone addresses it. The solution is either extending the smooth finish into the transition area or feathering the new texture to match the old.
This is a detail that separates contractors who think about the finished result from those who stop at “the popcorn is off.” It matters especially in open floor plans where the ceiling runs continuously through several zones.
The same issue comes up on walls. If the scraping process damages a wall surface near the ceiling line, and it often does, those repairs need to blend into the existing wall texture. That’s part of why popcorn removal and interior painting work are typically quoted together. Doing them separately usually costs more in the long run and produces worse results at the transitions.
How long the project takes room by room
Realistic timelines for a typical San Diego home:
- Single bedroom (150–200 sqft ceiling): 1–2 days including skim, prime, and paint
- Living room or great room (300–450 sqft ceiling): 2–3 days
- Full single-story home (1,200–1,800 sqft): 4–7 days depending on repair needs
- Asbestos abatement adds: 1–3 days for containment setup, abatement, and air clearance testing
These assume the crew can work through the space without moving furniture constantly. Clearing the room before the crew arrives saves real time. Everything needs to move out anyway, the plastic sheeting used for dust containment goes floor-to-wall, and furniture left in the room creates obstacles.
If you’re combining removal with a full interior repaint, scheduling them back-to-back is the efficient approach. The ceiling work happens first; wall painting follows once the ceiling is fully cured. Read more about what a full interior project involves on our interior painting cost breakdown.
What separates a clean job from a messy one
Dust. That’s the honest answer. Wet-scraping contains most of it, but popcorn texture still produces significant debris, and it travels. A professional crew uses floor-to-ceiling plastic sheeting on every wall, protects HVAC returns, and uses a HEPA shop vacuum during scraping, not after.
After scraping, the floor plastic gets rolled up from the inside out and removed before any mud or paint work begins. That containment step keeps texture debris out of carpet, out of light fixtures, and off furniture in adjacent rooms.
Beyond dust control:
- Consistent skim thickness. Uneven skim coats create high and low spots that show under raking light from windows. Good applicators work in even passes and check their work with a work light held at a low angle.
- Proper dry time between coats. Joint compound that gets painted over before it fully dries will crack. In San Diego’s typically low-humidity climate, this is less of a risk than in coastal areas, but it still matters in rooms with poor ventilation.
- Clean paint lines at the wall-ceiling junction. Once the ceiling is painted, the wall color gets cut back in neatly. Sloppy ceiling work that gets fixed with tape is a shortcut that shows up in close-up lighting.
A finished smooth ceiling should look like it was always there. If you’re standing in the room and thinking about the ceiling at all, something didn’t go right.
Frequently asked questions
How much does popcorn ceiling removal cost in San Diego? Most San Diego homeowners pay $1.50 to $3.50 per square foot for professional removal, all-in. A 200-square-foot bedroom typically runs $300–$700; a full single-story home (1,200–1,800 sqft) lands between $2,100 and $4,900. High ceilings, thick texture, and drywall repairs push costs toward the upper end.
Do I need an asbestos test before removing popcorn ceiling? Yes, if your home was built or significantly remodeled before 1980. Popcorn texture from that era frequently contained chrysotile asbestos, and disturbing it without approved abatement is a violation of EPA and San Diego County Air Pollution Control District rules. Testing costs $200–$450 and takes 3–5 business days. If asbestos is found, licensed abatement adds roughly $3–$7 per square foot.
Is popcorn ceiling removal worth it? For most San Diego homeowners, yes. Smooth ceilings modernize the space, photograph better for listings, and eliminate a surface that collects dust and discolors with age. The cost is a one-time expense, and the result holds up for the life of the home.
How long does popcorn ceiling removal take? A single bedroom takes 1–2 days from scrape through final paint. A living room or great room runs 2–3 days. A full single-story home typically takes 4–7 days, depending on how much drywall repair the surface needs after scraping. Asbestos abatement adds 1–3 days for containment, abatement, and air clearance.
Can I remove popcorn ceiling myself? You can, on a post-1978 home with a clean asbestos test. The scraping itself isn’t difficult, but the skim coat and surface repair that follow require real drywall skill. Uneven skim coats show badly under any raking light from windows. Most DIY jobs end up with a ceiling that looks worse than the original texture because the repair work gets skipped or done poorly.
What goes on top after the popcorn is scraped off? After scraping, the ceiling gets skim-coated with setting-type joint compound in two passes, sanded between coats, then primed with PVA primer and painted with two coats of flat ceiling paint. The skim coat is what creates the smooth, consistent surface, and it’s the step that separates a professional result from a rough scrape.
When to call us
Popcorn ceiling removal in a pre-1980 San Diego home, or any home where you’re not certain about the texture’s composition, needs a licensed contractor who can handle the asbestos testing coordination and, if needed, abatement. Even on newer homes, the skim coat and repair work that follow scraping require the same skills as any drywall and interior painting project. This isn’t a weekend DIY job if you want a result that holds up.
Call us at (858) 925-5546 for a same-day estimate.