Caulk baseboards before painting, not after. In San Diego homes, gaps form as houses settle and wood moves with coastal humidity, leaving visible shadow lines that no amount of paint will hide. A thin bead of paintable acrylic latex caulk, smoothed and dried before you roll, fills those gaps and creates a continuous surface so paint lays flat from wall to trim. The one exception is touch-up on already-painted trim, covered at the end. For the full sequence across trim, windows, and stucco, see our guide on whether you caulk before or after painting.
What caulking actually does for your trim
Caulking serves as a vital bridge between your baseboards and the wall. Think of it as a flexible filler that seals any tiny cracks or gaps. These imperfections naturally appear as houses settle, wood expands and contracts with San Diego’s humidity changes, or during initial construction. Left unsealed, these gaps are like glaring spotlights on an otherwise smooth surface.
When you apply caulk, you’re not just filling space. You’re creating a continuous, smooth plane. This ensures that when paint goes on, it lays evenly across both surfaces, creating the illusion of a single, perfectly fitted piece of trim. Without caulk, paint can seep into the gaps, or simply bridge over them, leaving unsightly lines and voids. It’s the secret to making your baseboards look like they’re custom-fitted, not just tacked on. This attention to detail is what separates a basic paint job from truly finished trim, doors, and baseboards. It seals out dust and moisture too, adding a layer of protection to your home.
The shadow lines that make paint jobs look cheap
Imagine a newly painted room with a crisp, clean wall color and bright white trim. Now, look closer at the baseboards. Do you see thin, dark lines running along the top edge, where the baseboard meets the wall? Those are shadow lines, and they’re the tell-tale sign of uncaulked gaps. Even the smallest imperfection casts a shadow, especially in natural light from your windows.
These shadows draw the eye directly to the imperfections, making the entire paint job appear unfinished and amateurish. Paint itself has no filling properties for these types of gaps. It will simply follow the contours of the surface, highlighting any crevices instead of concealing them. What you thought would be a smooth transition becomes a jagged edge, undermining the entire aesthetic of your room. It’s these seemingly minor details that significantly impact the overall perceived quality and value of your home’s interior. A professional finish demands the elimination of these distracting visual flaws.
How to get a seamless, professional finish
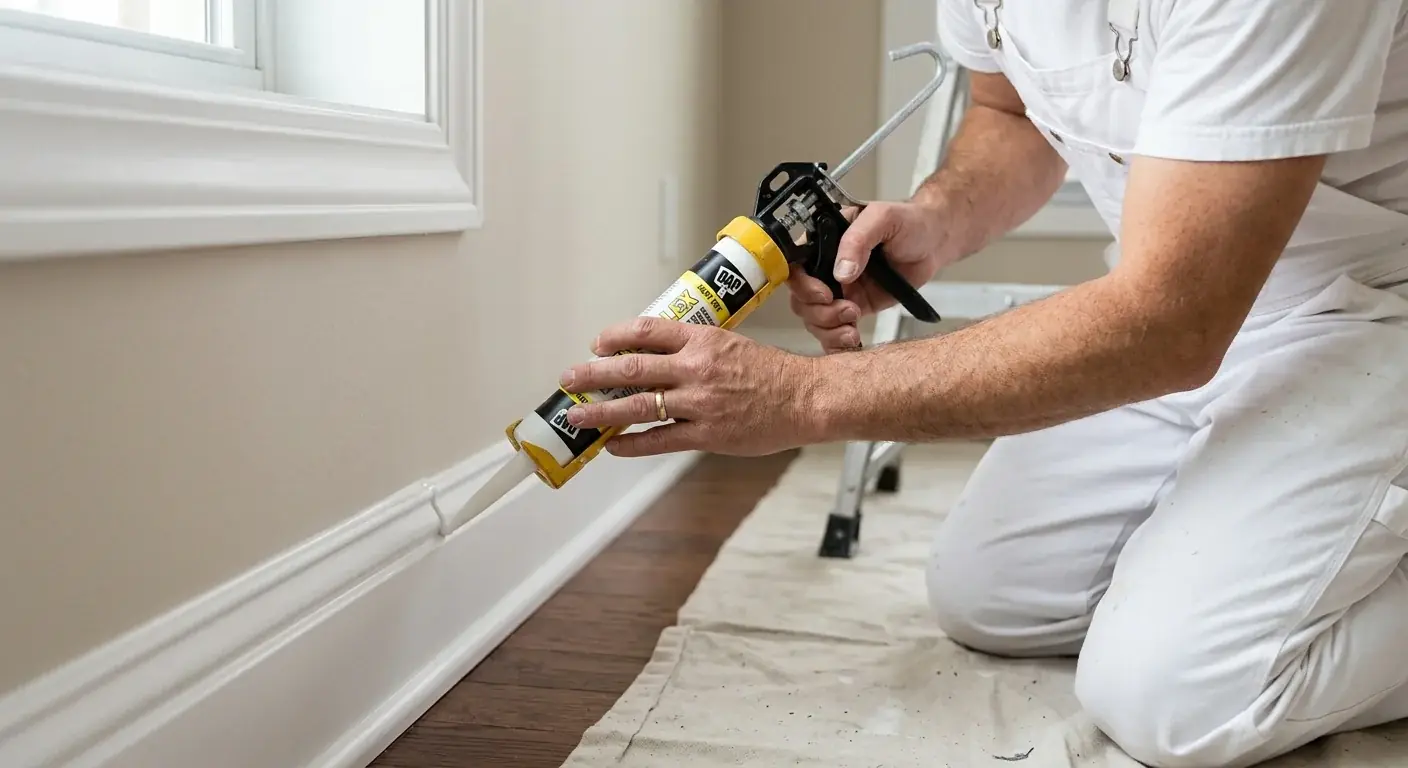
Achieving that perfectly seamless look isn’t magic; it’s about proper preparation, and caulking is at the heart of it. First, clean the baseboards thoroughly. Any dust or debris will prevent the caulk from adhering correctly. Next, choose the right caulk (more on that below). Apply a steady, even bead along the joint where the baseboard meets the wall. The key is consistency and a firm hand.
After applying the bead, tool it immediately. This means using a damp finger, a specialized caulk tool, or even a wet sponge to smooth the caulk into the gap. This process removes excess caulk and presses it firmly into the joint, creating a concave or flat surface that blends seamlessly. This is where the magic happens. Once dried, this smooth, filled joint is ready for paint, allowing for a truly unified and flawless appearance. For more detailed instructions on specific techniques for a pristine finish, you might find our guide on trim and baseboard painting in San Diego helpful.

Choosing the right caulk for the job
Not all caulk is created equal, and selecting the correct type is crucial for lasting results. For interior painting projects, especially around baseboards, you’ll want a high-quality acrylic latex caulk that’s explicitly labeled as “paintable.” These caulks are flexible enough to accommodate minor movement without cracking, yet they provide a hard, smooth surface once dry.
Look for caulk that offers good adhesion to both wood and drywall. Some premium acrylic latex caulks also contain silicone for added flexibility and durability, often called “acrylic latex caulk with silicone.” Avoid pure silicone caulk for painting projects, as paint does not adhere well to it. Also, check the drying time specified on the tube. Most paintable caulks allow painting within a few hours, but some might require a full 24 hours to cure properly. Picking the right product ensures that your prep work stands the test of time and takes paint beautifully.
Gap size decides the product and the technique
Not every baseboard gap takes the same approach, and matching the product to the gap is what keeps the bead from cracking later. Hairline gaps up to about 1/4 inch take a standard paintable acrylic-latex caulk straight from the tube. Run one pass, tool it, done. Once a gap runs wider than 1/4 inch, a single bead sags and shrinks as it cures, so pack the cavity with foam backer rod first. The rod gives the caulk a backstop to compress against and caps the depth, which is what stops the centerline crack you see on deep beads.
The full pro order on new baseboards is nail-set, fill the nail holes with spackle or wood filler, sand flush, prime, then caulk, then paint. Caulk goes after the filler and primer for a reason: filler handles holes in the face of the wood, caulk handles the joint between two surfaces, and primer seals the substrate so the bead actually bonds. Swap that order and you get a wavy line along the top of the trim.
San Diego baseboards have their own quirks
East County homes (El Cajon, Santee, Lakeside, Alpine) sit in dry, dusty inland air. That fine stucco-and-grit dust settles into the baseboard joint and kills caulk adhesion, so wipe the joint with a damp cloth and let it flash off before you run a bead. Coastal homes (Pacific Beach, La Jolla, Encinitas, Carlsbad) run the opposite problem: marine-layer humidity stretches caulk cure times, so give a paintable bead a few hours longer than the tube says before you paint over it.
One safety note for older San Diego housing stock. Homes built before 1978 can carry lead paint on the original baseboards, and sanding old trim before you re-caulk releases that dust. On a pre-1978 home, the painters we match are EPA RRP certified and follow lead-safe practices on any paint disturbance. That’s not a step to improvise on a Saturday with a random orbital sander.
When a pro painter includes caulking in their prep
For professional painters, caulking baseboards isn’t an optional add-on; it’s a fundamental part of the standard preparation process. When you work with a contractor matched through Paint Pros San Diego for your interior painting project, caulking baseboards is part of the standard prep, not an add-on. This thorough prep work is a significant factor in the superior quality of a professional paint job compared to a DIY attempt.
Professional painters understand that excellent paint adhesion and a flawless finish begin long before the first brushstroke. They have the experience to quickly identify problem areas, select the right caulk, and apply it with precision and efficiency. This expertise saves you time, prevents frustrating mistakes, and ultimately delivers a result that elevates your home’s appearance. It’s a key part of the value you get when you trust licensed professionals. You can always check a contractor’s license with the CSLB at cslb.ca.gov.
Why this step is non-negotiable for a quality result
Ultimately, caulking your baseboards before painting is non-negotiable if you want a truly professional and long-lasting finish. It’s the difference between a paint job that looks like it was done quickly and one that looks like it belongs in a magazine. This simple yet critical step eliminates distracting shadow lines, creates a uniform surface for paint application, and helps protect your home from dust and drafts.
Beyond aesthetics, properly caulked baseboards contribute to the longevity of your paint job. They prevent paint from cracking or flaking prematurely in areas of movement or temperature fluctuations. For homeowners in San Diego, where coastal environments can impact materials, this attention to detail is even more vital. Investing time in caulking, or hiring a professional who includes it in their prep, ensures your freshly painted rooms look their best for years to come.
Frequently asked questions
Do you have to caulk baseboards before painting? You don’t have to, but you should. Without caulk, gaps between the baseboard and wall cast shadow lines that paint won’t cover. In San Diego homes, wood movement from coastal humidity makes those gaps worse over time. Caulking takes 30 minutes and is the single prep step that separates a flat amateur finish from a clean interior painting result.
What type of caulk should I use on baseboards before painting? Use a paintable acrylic latex caulk, or an acrylic latex caulk with silicone for added flexibility. Avoid pure silicone caulk because paint won’t stick to it. Check the tube for a “paintable” label and confirm the dry time before you start.
How long does caulk need to dry before painting? Most paintable acrylic latex caulks are ready to paint within a few hours. Some formulas require a full 24 hours to cure. Read the label on your specific product. Painting over wet caulk causes it to wrinkle and crack, so don’t rush this step.
Is caulking baseboards worth it in San Diego? Yes, especially here. Coastal humidity causes wood trim to expand and contract more than in dry inland climates, which opens gaps faster. Caulking seals those gaps, protects against dust and moisture, and extends how long your paint job stays looking fresh. It’s a small time investment with a clear visual payoff.
Does a professional painter caulk baseboards as part of the job? A quality painting contractor in San Diego includes caulking in standard prep. It’s not an add-on. If a painter skips it, that’s a red flag about the rest of their process.
Can I caulk baseboards myself or should I hire someone? You can DIY it on a small room with basic tools. Running a consistent, clean bead on long runs of trim, corners, and transitions takes practice. On larger projects or older homes with irregular gaps, a pro will do it faster and cleaner, and you won’t have to repaint sections where the caulk pulled away.
Should I ever caulk baseboards after painting? Only for touch-ups on trim that’s already painted. If a small gap opens after the finish coat, from settling or a missed spot, you can run a thin bead of color-matched or clear paintable caulk, tool it flat, and touch-paint the line. For any new baseboard or full repaint, caulk before the finish coat. A bead left bare on a finished wall reads as a different sheen and collects dust, even when the caulk is technically paintable.
When to call us
While caulking might seem like a small detail, it takes skill and precision to do correctly for a truly perfect finish. If you’re tackling a large painting project, or simply want to ensure your baseboards look absolutely flawless, a professional touch makes all the difference.
Call us at (858) 925-5546 for a same-day estimate.